
Commit27 //#JavaScript30 - Day 13 [Slide in Images]
In this challenge we will use javascript to make images appear to slide into the article as we scroll down.


I am learning with Skillcrush. Please check them out and consider signing up if you're looking to break into tech! Receive $250 off your course by using the link above. Use the coupon code: TWIXMIXY
NOTE: this discount is for Break Into Tech + Get Hired package exclusively.
It's the same program I am participating in!
Today's challenge comes from JavaScript30.
This morning I met with my therapist. This has been a crucial part of my career break. All of us have our things, our cycles that we continue to repeat. Therapy has definitely helped me to identify some of mine so that I can attempt to work with them.
Growing up I came from a community that kind of stigmatized therapy. I think that’s a lot of communities though. Thankfully now amongst my peers and my social circles, therapy is a widely accepted method of navigating life.
My therapist shared this song with me today. I guess that means she’s calling me weird (how did she figure that one out?? 😂), but more so letting me know I’m having very normal human reactions to life right now.
If reading this is causing you to roll your eyes, then may I recommend…

It’s ok to be kind and to be gentle with yourself and others. 🌈
✨ Let’s get started!
JavaScript30 - Day 13
To start us off, the instructor gives us a function called debounce, which he says he’ll review later with us. For now, here it is.
<script>
function debounce(func, wait = 20, immediate = true) {
var timeout;
return function() {
var context = this, args = arguments;
var later = function() {
timeout = null;
if (!immediate) func.apply(context, args);
};
var callNow = immediate && !timeout;
clearTimeout(timeout);
timeout = setTimeout(later, wait);
if (callNow) func.apply(context, args);
};
}
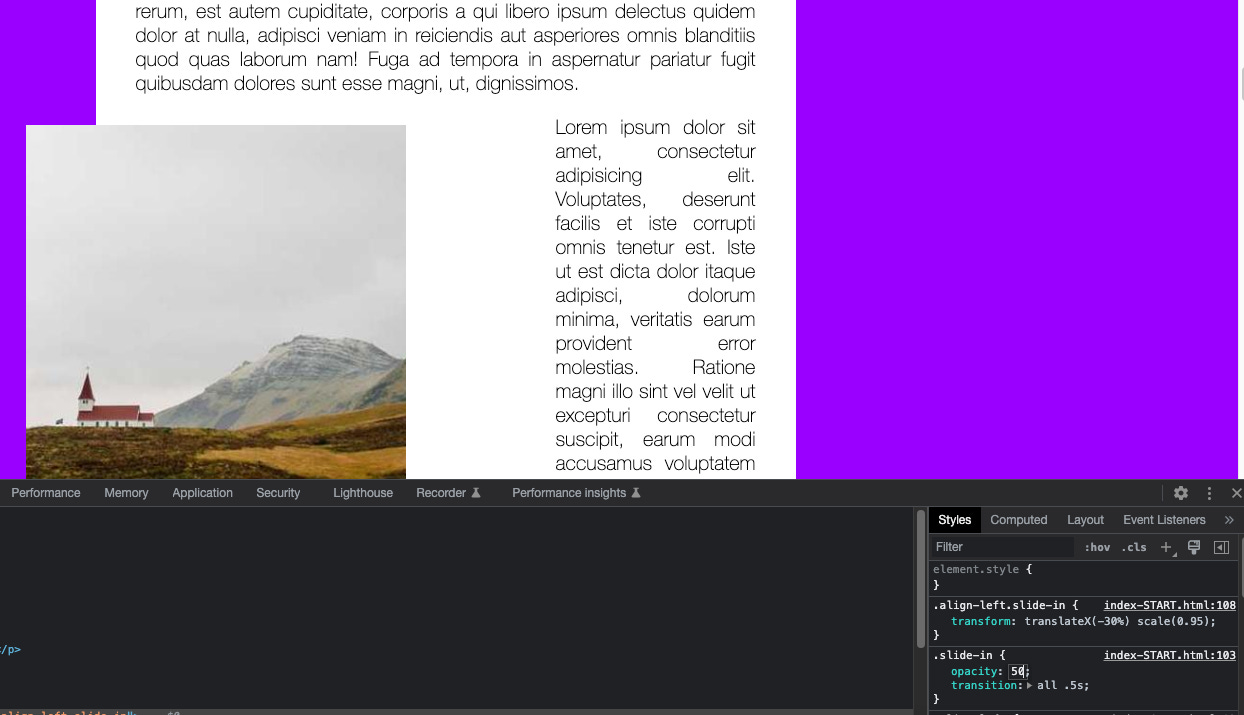
</script>The images we are going to have “slide” onto the screen are hidden using CSS.
    .align-left.slide-in {
      transform: translateX(-30%) scale(0.95);
    }
For example, this is controlling the images on the left side. They are offset by about 30%, which isn’t all the way off the screen. Because…
    .slide-in {
      opacity: 0;
      transition: all .5s;
    }
This style is hiding the image completely using the opacity.
If we update these, we can see them shift around on the screen and not be completely hidden via opacity.
The way we do this is by applying the active class.
    .slide-in.active {
      opacity: 1;
      transform: translateX(0%) scale(1);
    }
To begin we want to select all of the images.
const sliderImages = document.querySelectorAll('.slide-in');All of the images have a class of slide-in.

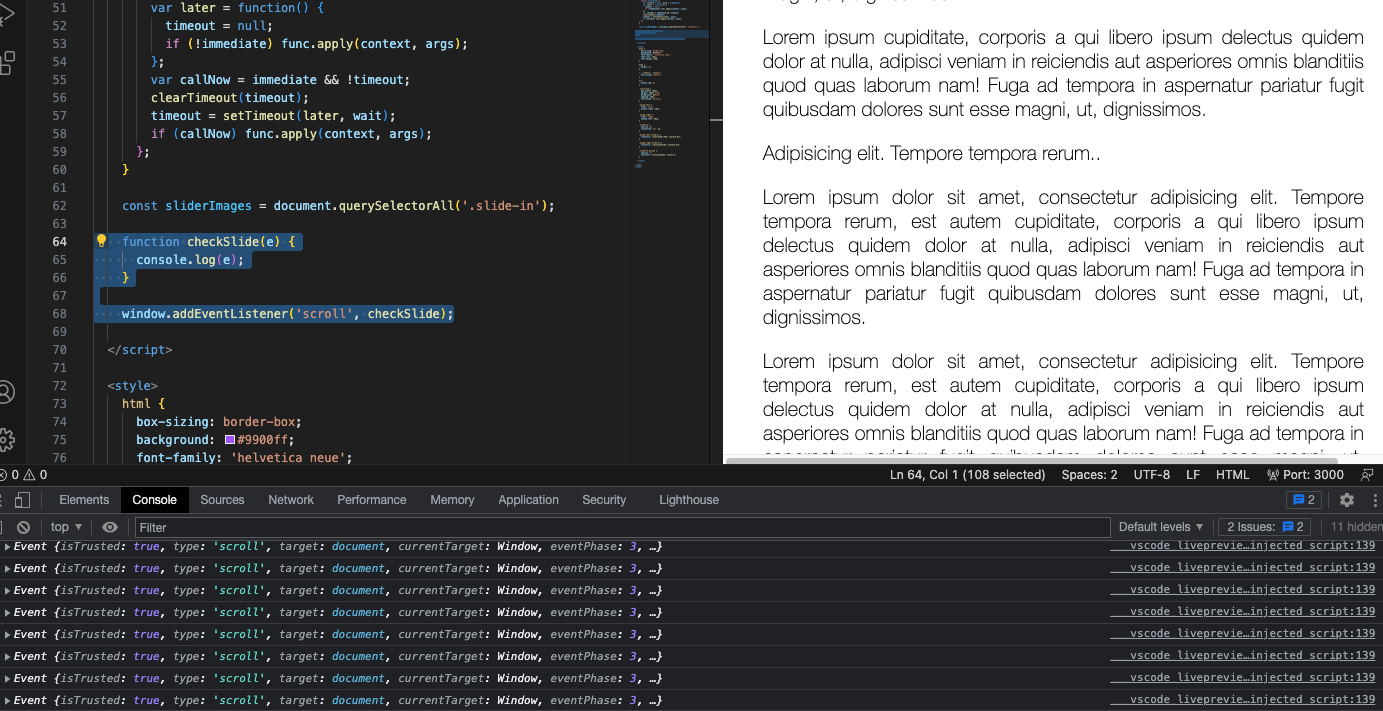
Now we need to create a function to make the images slide when we scroll. So we need to make sure we can console log it first and add an event listener to listen for the scroll.
    function checkSlide(e) {
      console.log(e);
    }

    window.addEventListener('scroll', checkSlide);
Now we can see in our console log, that events are occurring when we scroll.
As you can see it’s running WAY too much. Now this is where the debounce function comes in. At the top of the code you can see it’s requesting the function wait every 20 milli-seconds.
    function checkSlide(e) {
      console.count(e);
    }

    window.addEventListener('scroll', debounce(checkSlide));
To accomplish this we run the checkSlide event listener through the debounce.
We also updated our console log to console.count so that we could see how many instances are being logged.
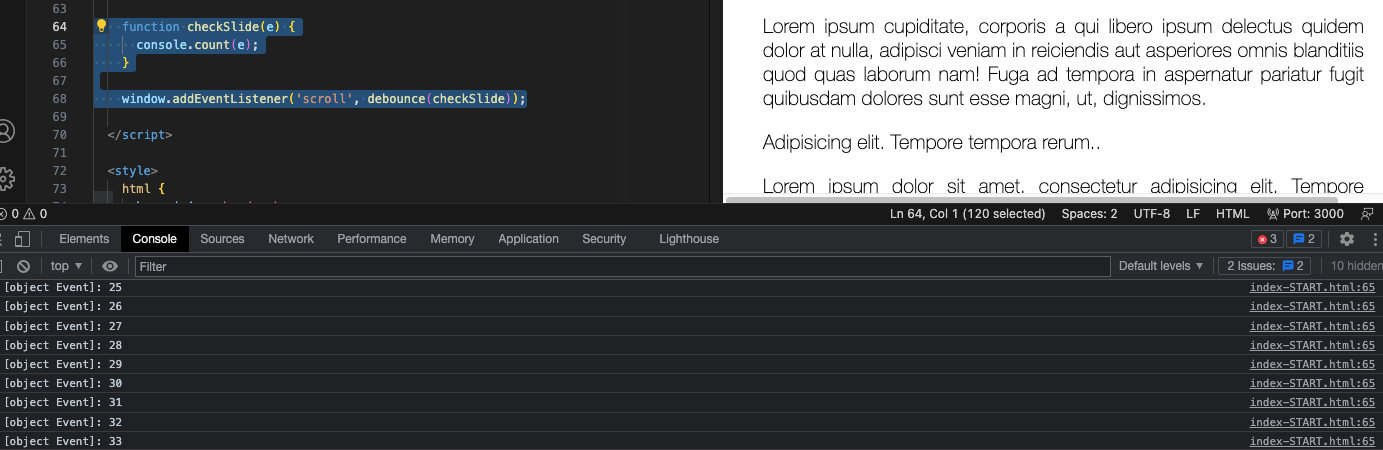
It’s about half as much as before.
Anytime you are using a scroll event listener you will likely want to debounce it. The debounce function can be found through a google search.
The rest of our work will mostly be in the checkSlide function. To begin we want to write a forEach loop. Lots of maths, apparently! So let’s see if I can explain it.
However, we want the image to slide in as we are scrolling, which means we need to determine where along the page the image should begin sliding in.
console.log(window.scrollY);Within the function this console log will indicate how far down we have scrolled from the top Y axis.

However, we need to make sure it’s reading the bottom of our screen, not the top of it.
const slideInAt = (window.scrollY + window.innerHeight);
        console.log(slideInAt);
This now indicates where the bottom of our screen is.
Of course, we don’t want it to slide in once the whole picture is in frame, so more math!
const slideInAt = (window.scrollY + window.innerHeight) - sliderImages.height / 2;
        console.log(slideInAt);
We add in the image at its full height and then divide it by two. You can see the Y axis number jump around as we encounter each image.

Now we are going to make sure we have the same effect if we are scrolling from the bottom to the top.
const imageBottom = sliderImages.offsetTop + sliderImages.height;Begin by declaring the imageBottom variable.
const isHalfShown = slideInAt > sliderImages.offsetTop;Another variable for when the image should slide in. These will ultimately go into IF statements for when they should occur.
const isNotScrolledPast = window.scrollY < imageBottom;Last variable for determining if the window has scrolled past the image.
Now to begin on our IF statement.
if (isHalfShown && isNotScrolledPast) {
          sliderImages.classList.add('active');
        } else {
          sliderImages.classList.remove('active');
        }
So if the isHalfShow and isNotScrolledPast are in play then add the active class to the sliderImages. Otherwise remove the active (so they will disappear).
The instructor recommends logging out each of the variables inside the checkSlide to see how they are working and what they are doing.

That’s it for today! Relatively quick and simple. I still wouldn’t be able to do something like this without assistance, but I feel like the repetition of these challenges is beginning to get it a bit more into my head.
Have you ever used the debounce function? I’d love to hear about your experience! Or if you just have something you want to share after reading this article, please leave me a comment. Have a great day!