
Commit39 //#JavaScript30 - Day 15 [LocalStorage and Event Delegation]
In this challenge we will use javascript to better understand localstorage and event delegation

I am learning with Skillcrush. Please check them out and consider signing up if you're looking to break into tech! Receive $250 off your course by using the link above. Use the coupon code: TWIXMIXY
NOTE: this discount is for Break Into Tech + Get Hired package exclusively. It's the same program I am participating in!
Today's challenge comes from JavaScript30.
Since I wrapped up my JS React course yesterday I thought I would dedicate the next week or more to finishing the JS30 challenges. I have a lot that I want to accomplish with my coding in the next couple months, so this may mean that I’m publishing multiple times a day to get through all of this content.
JavaScript30 - Day 15
I’ve already used LocalStorage some in my JS React course, so I’m excited to see Wes Bos’ perspective on utilizing it.
  <div class="wrapper">
    <h2>LOCAL TAPAS</h2>
    <p></p>
    <ul class="plates">
      <li>Loading Tapas...</li>
    </ul>
    <form class="add-items">
      <input type="text" name="item" placeholder="Item Name" required>
      <input type="submit" value="+ Add Item">
    </form>
  </div>

<script>
  const addItems = document.querySelector('.add-items');
  const itemsList = document.querySelector('.plates');
  const items = [];

</script>
This is basically our starter code. They have already selected our class elements and created an empty array.
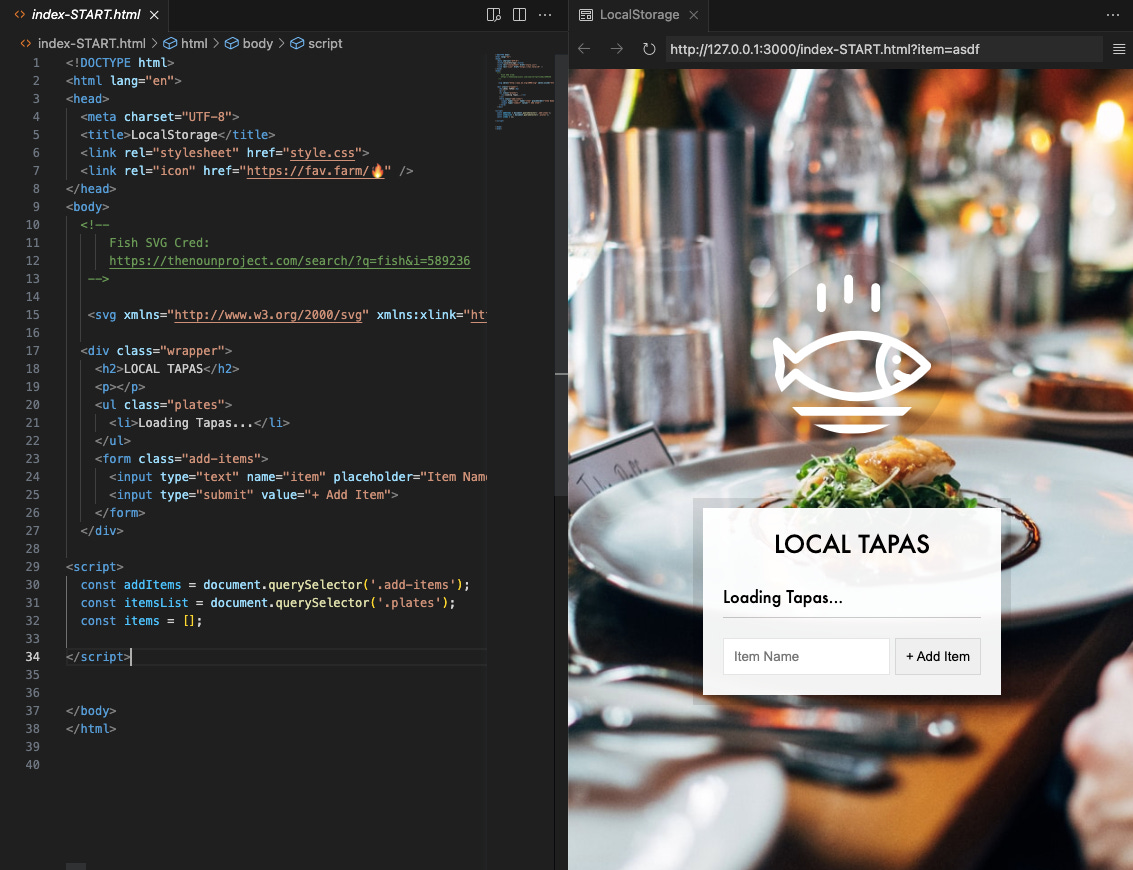
We will be building a list of tapas that we can toggle (check) and also make it that if we refresh the page then the data will remain (localstorage).
addItems.addEventListener('submit', addItem);To kick things off we will add an event listener that will listen for a ‘submit’ event, so that it covers everything if folks hit enter or click the button. We will run that through a new function that we are going to create, addItem.
function addItem(e) {
    e.preventDefault();
  }
Immediately we find that our page is refreshing when we enter a new item, which we don’t want the page to do because it clears out everything, including the console log.
  function addItem(e) {
    e.preventDefault();
    const item = {
      text: 'Item Name',
      done: false
    }
  }
Now we need to add the variable for the item we want added to the list. Giving it a default name (text) for now and setting the done to false (meaning the item on the list is not checked).
  function addItem(e) {
    e.preventDefault();
    const text = this.querySelector('name=item')
    const item = {
      text: 'Item Name',
      done: false
    }
  }
OK for us to determine the code above for const text = this.querySelector('name=item') we need to inspect the webpage to determine this value.
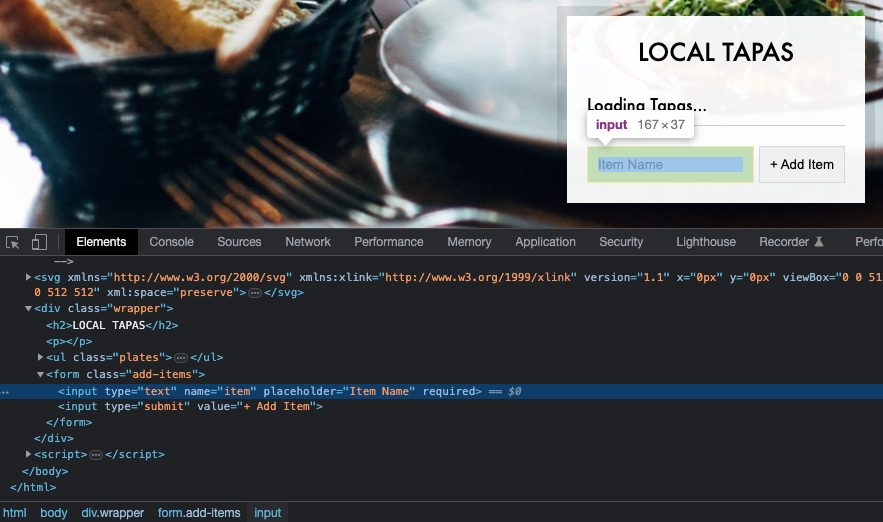
Additionally the reason we are able to say it is this. at the beginning is because it’s referring to the form we are in. I still don’t fully understand that part. I imagine I’ll need to experience working with this on several more projects before I fully understand how it functions.
  function addItem(e) {
    e.preventDefault();
    const text = (this.querySelector('[name=item]')).value;
    const item = {
      text: 'Item Name',
      done: false
    }
  }
Now we are wrapping the text variable in parenthesis and appending it with .value. From my understanding the value will refer to what is written in the item field.
  function addItem(e) {
    e.preventDefault();
    const text = (this.querySelector('[name=item]')).value;
    const item = {
      text: text,
      done: false
    }
  }
Updating the property text value to text so that it refers to the text variable. The instructor also says you can take that whole line out and just write the text variable and it will refer back to it. Like so:
function addItem(e) {
e.preventDefault();
const text = (this.querySelector('[name=item]')).value;
const item = {
text,
done: false
};
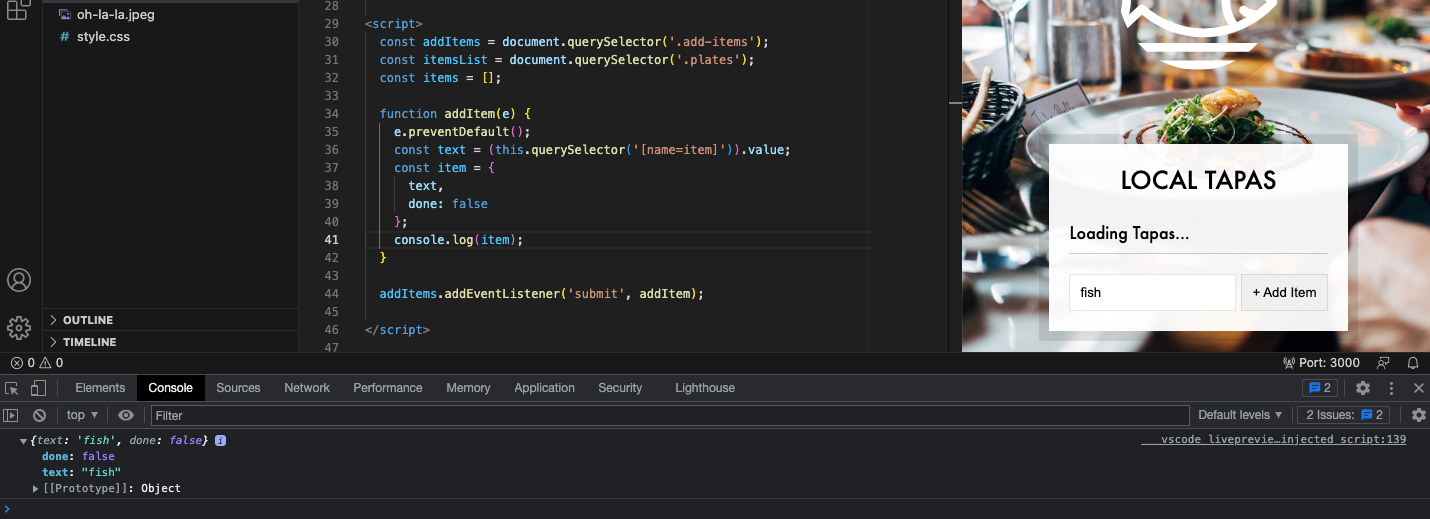
}If we run a console log in the function we can now see the record of what is being entered into the field.
Now we want to make sure the field resets itself after we’ve entered an item to the list with this.reset();.
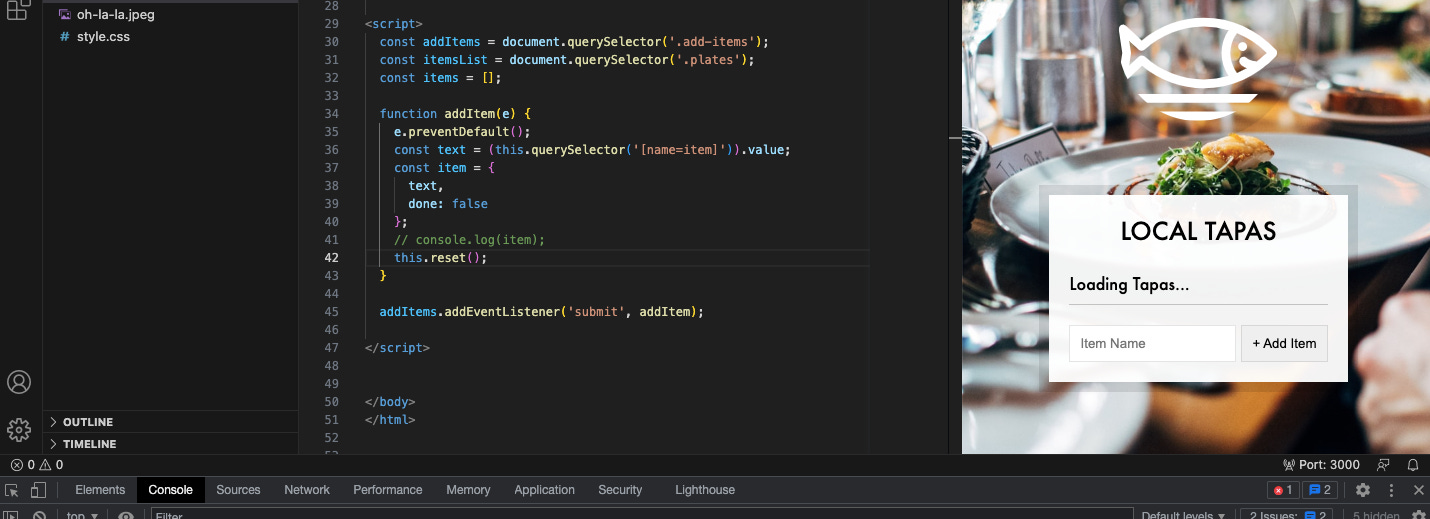
  function addItem(e) {
    e.preventDefault();
    const text = (this.querySelector('[name=item]')).value;
    const item = {
      text,
      done: false
    };
    // console.log(item);
    this.reset();
  }
Now we want to take the item being entered into the text field and push it into our array, const items = []; by using items.push(item);.
const items = [];

  function addItem(e) {
    e.preventDefault();
    const text = (this.querySelector('[name=item]')).value;
    const item = {
      text,
      done: false
    };
    // console.log(item);
    items.push(item);
    this.reset();
  }
If we run a console.log within the function, we can see the items being added on the backend.
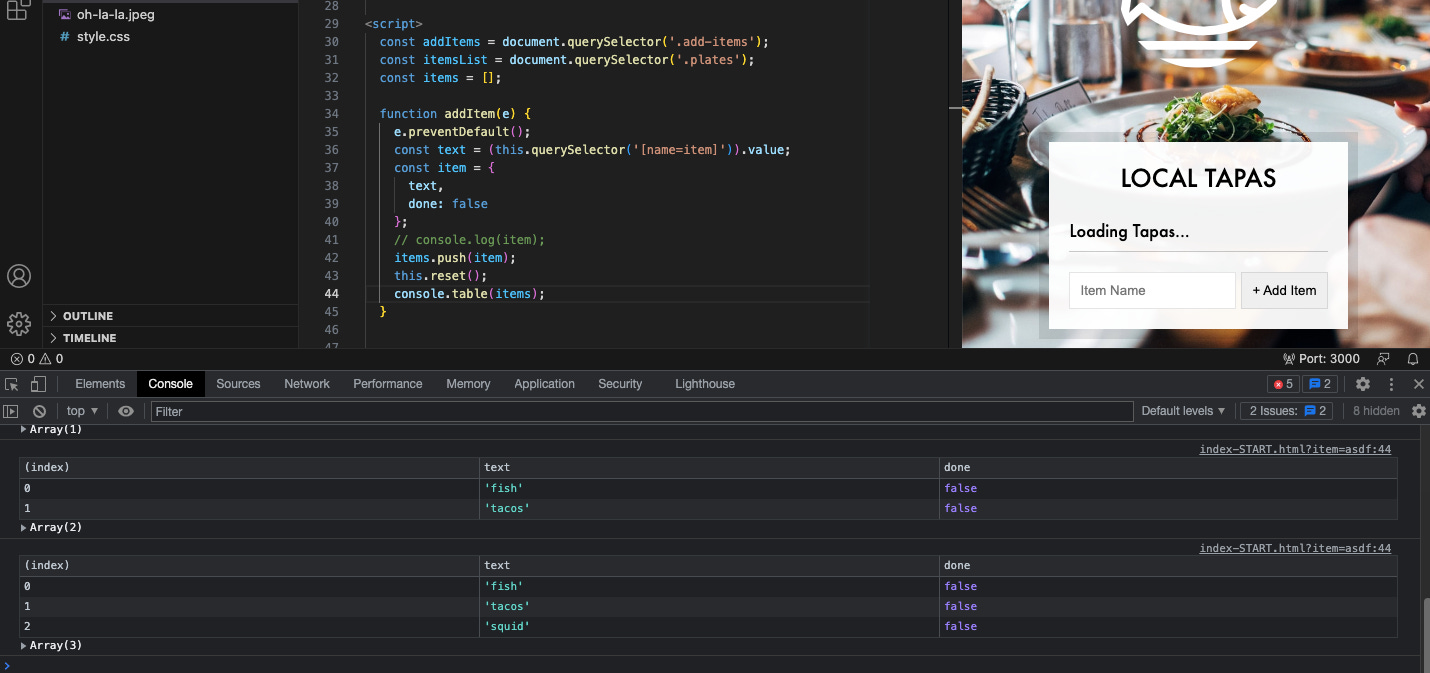
I’m actually pretty proud of myself for this console log (or table) step because I went ahead and checked my work before being prompted by the instructor and figured out where to appropriately place the console log to see the data being entered. It will seem simple to any developer, but it’s big for me!

Now time to populate the list in the UI!
  function populateList(plates = [], platesList) {

  }
The instructor spent a lot of time explaining why they were naming the pass throughs in this function a particular way, but I’m not really getting it. Maybe it’ll come together the further we get in the build… or on some other day completely.
  function populateList(plates = [], platesList) {
    platesList.innerHTML = plates.map((plate, i) => {
      return `

      `;
    });
  }
For the previous function I was really feeling like I understood… this one I’m not getting it AT ALL. If you understand please leave me a comment.
  function populateList(plates = [], platesList) {
    platesList.innerHTML = plates.map((plate, i) => {
      return `
      <li>
        <label for="">${plate.text}</label>
        </li>
      `;
    }).join('');
  }
So I can tell that this is drafting up our list. We are mapping over the array to determine that we are adding these items. Then we are using join to compile them together back into one string or object? Yeah, this part is stumping me, even through his explanations. I could listen over and over again or just write up what he’s saying verbatim, but I know I’m not grasping what is happening in this function just yet.
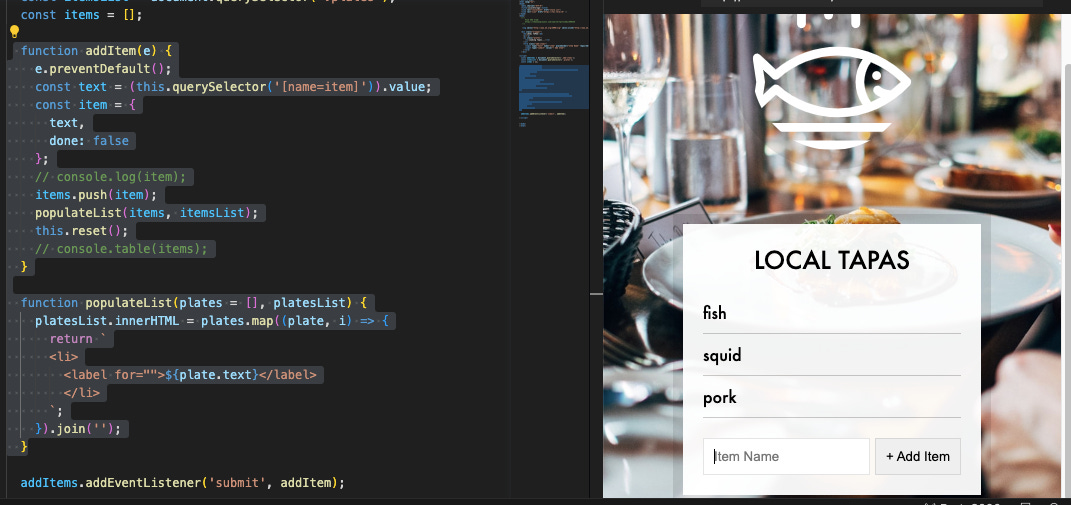
Now we are adding our new function populateList(items, itemsList); to the addItem function.
 function addItem(e) {
    e.preventDefault();
    const text = (this.querySelector('[name=item]')).value;
    const item = {
      text,
      done: false
    };
    // console.log(item);
    items.push(item);
    populateList(items, itemsList);
    this.reset();
    // console.table(items);
  }

  function populateList(plates = [], platesList) {
    platesList.innerHTML = plates.map((plate, i) => {
      return `
      <li>
        <label for="">${plate.text}</label>
        </li>
      `;
    }).join('');
  }
Now we have items successfully adding to the list!
Now we need to add the checkbox.
      <li>
        <input type="checkbox" data-index=${i} id="item${i}" />
        <label for="item${i}">${plate.text}</label>
      </li>
the id and the for are the same?? is what he said. The ${i} is related to the index as far as I can tell from within the array of items.
We need to add an operator to determine if the item should be checked or not.
${plate.done ? 'checked' : ''} If the plate.done is true, then it should be checked. Otherwise it will be nothing.
      <li>
        <input type="checkbox" data-index=${i} id="item${i}" ${plate.done ? 'checked' : ''} />
        <label for="item${i}">${plate.text}</label>
      </li>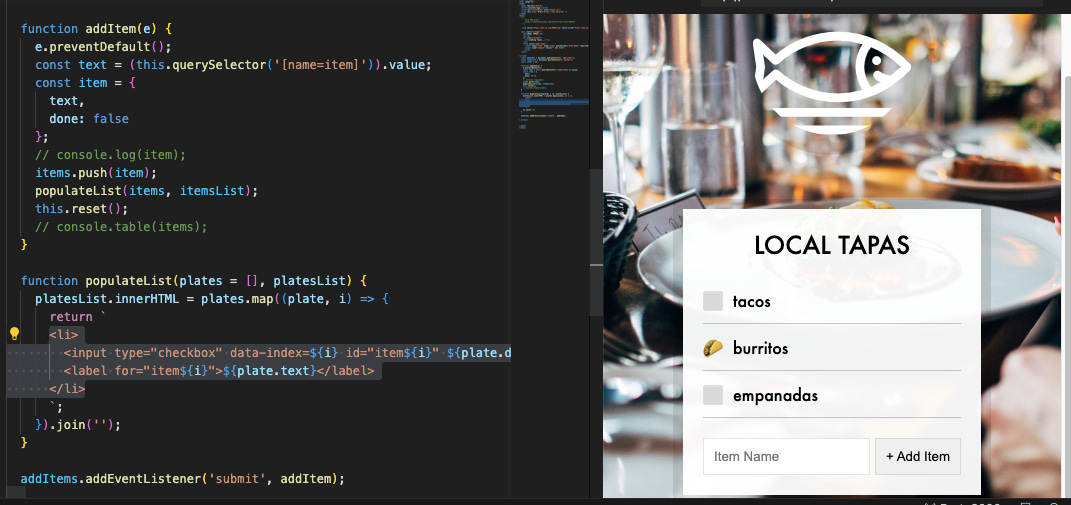
The taco is the checkmark and that was done through the CSS. Pretty cool, something to replicate if I’m feeling fun on a project.
Now to move on to localStorage, but we need to stringify our objects before they can be stored.
localStorage.setItem('items', JSON.stringify(items));This will stringify the items in local storage.
populateList(items, itemsList)At the end of our code we need it to populate list… I really didn’t understand what this one was doing, but it was important to be at the end.
const items = JSON.parse(localStorage.getItem('items')) || [];Then we need to update the items array to load any items that were saved down to local storage || OR load the blank array.
However, our taco toggle isn’t persisting when refreshing. So we need. anew function for that.
  function toggleDone(e) {

  }
Before that though we need an event listener. To summarize basically the problem is that the list items have not or may not be added yet to the list so we have to pass the instructions through the unordered list parent to get the message to the individual list items.
itemsItems.addEventListener('click', toggleDone);Now the problem is that it’s collecting clicks from all around the UL. So we have to specify it to only when there is an input. Like a checkbox.
  function toggleDone(e) {
    if(!e.target.matches('input'))  return //skip this unless input
  }
To refer back to the data.index that was to itemize which item was in the array, so that at this point we can tell the local storage to remember that specific item if it was checked or not.
  function toggleDone(e) {
    if(!e.target.matches('input'))  return //skip this unless input
    const el = e.target;
    const index = el.dataset.index;
    items[index].done = !items[index].done;
    localStorage.setItem('items', JSON.stringify(items));
  }
OK. A lot going on here. From my understanding it’s cataloging which items are marked as done and which are not. Then it’s storing it in the local storage.
That’s it for this challenge. This one was a doozy.
The instructor added an extra challenge to see if we could add a button that does check all / uncheck all or delete all. That sounds intense to me! Definitely a good idea to add on when working out what I want in my portfolio.
See the project live on Twixmixy.com!
What did you think of that challenge? Do you know how to make a check/uncheck all function? What about a delete all? Leave a comment to help me get started!